Stop Cold Spots: DIY Sleeping Bag Modifications for Tailored Warmth
By Maya Ndlovu • 6th Dec

Let's talk about those frustrating cold nights where your supposedly warm sleeping bags betray you with icy patches at your feet or neck. The truth is, temperature ratings alone won't save you from misery, they are just one variable in a complex equation. With DIY sleeping bag modifications, you can transform your existing gear into a personalized warmth system that actually works with your body mechanics. True comfort isn't about chasing lower temperature ratings; it's about solving the specific thermal mysteries your body creates in the field.
Why Your Sleeping Bag's Rating Lies to You (And What Actually Matters)
ISO ratings are based on a standardized male mannequin in controlled conditions, completely disconnected from your unique physiology and sleep habits. A 20°F bag might keep some people comfortable at 20°F, but if you're a side sleeper compressing insulation under your shoulder, a woman who typically runs colder, or camping in humid coastal conditions, that number becomes meaningless.
Comfort is multi-factor: fit, feel, fabric, and freedom.
When I was trekking along a humid coastline last season, I woke sticky in a bag rated well below the night's low, not because it was too warm, but because moisture had nowhere to escape. For fabric choices that actually move moisture, see our moisture-wicking sleeping bag fabrics guide. That experience cemented my belief that warmth perception is deeply personal, influenced by how your body moves and breathes through the night.
FAQ: Your DIY Sleeping Bag Modification Questions Answered
"My feet are always freezing - what DIY solution actually works?"
Cold feet signal moisture buildup meeting draft zones. Before adding layers, perform a condensation check: run your hand along the inner footbox. If it's damp, moisture management is your priority over extra insulation.
DIY fix: Create a vapor barrier liner (VBL) specifically for your foot area using a cut-down kitchen bag (like those Safeway vegetable bags mentioned in backpacking forums). Insert it between your base layer and sleeping bag lining, only covering your feet and lower legs. This traps moisture before it soaks your down, without creating clamminess across your entire body. Test first: too much vapor barrier can backfire by creating a swamp zone.
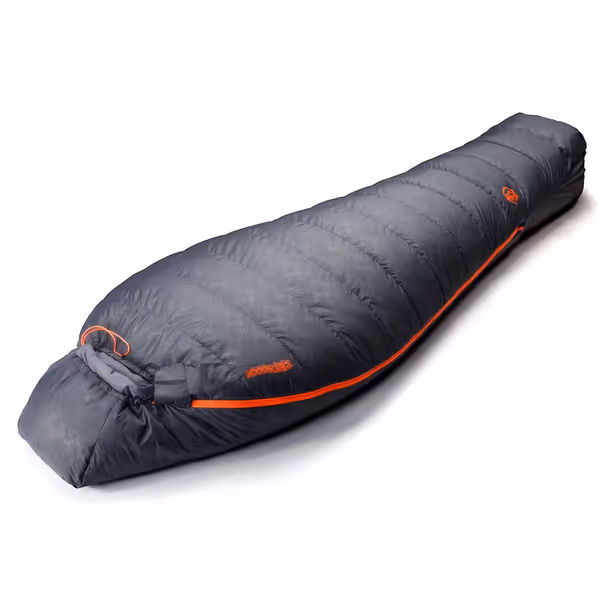
ZOOOBELIVES 10 Degree F Hydrophobic Down Sleeping Bag
Warm, dry, and packable for 4-season comfort in varied conditions.
$99.99
Lower Limit10°F (35oz 550 fill-power hydrophobic down)
Lower Limit10°F (35oz 550 fill-power hydrophobic down)
Pros
Reliable warmth down to 10°F with water-resistant down ensures dry comfort.
Integrated anti-snag YKK zipper for smooth entry/exit and durability.
Compact and lightweight for a 4-season bag (3.86lbs, 10"x7"x15" packed).
Cons
Mixed feedback on fit: some find it roomy, others very narrow.
Customers find the sleeping bag warm, with one mentioning it's perfect for cold weather camping, and appreciate its quality and value for money. They describe it as comfortable and lightweight, though some find it a bit heavy. The fit receives mixed feedback, with some finding it roomy while others note it's very narrow. The zipper quality and build quality also get mixed reviews, with some praising the zipper while others find it not great, and some saying it's well made while others disagree.
Customers find the sleeping bag warm, with one mentioning it's perfect for cold weather camping, and appreciate its quality and value for money. They describe it as comfortable and lightweight, though some find it a bit heavy. The fit receives mixed feedback, with some finding it roomy while others note it's very narrow. The zipper quality and build quality also get mixed reviews, with some praising the zipper while others find it not great, and some saying it's well made while others disagree.
"How do I fix draft tubes that let in cold air?"
Draft tube failures are the most common cause of neck/shoulder cold spots. Many bags have flimsy tubes that collapse when you adjust the hood or shift position. Proper draft tube repair techniques require understanding your sleep position:
- Back sleepers: Add a thin foam strip (like closed-cell sleeping pad scraps) inside the draft tube to maintain its structure
- Side sleepers: this is where drafts enter most aggressively, so reinforce with a second layer of shell fabric stitched along the zipper channel
Check your fabric hand: stiff ripstop needs simpler fixes than soft, pliable nylon that conforms to body shape. A proper repair should let the tube lay flat without restricting hood adjustment. Also understand how sleeping bag zipper types influence drafts and durability before you reinforce the channel.
"Can I modify my sleeping bag hood for better warmth without suffocating?"
Yes, but it requires precision. Most hoods fail by either:
- Leaving gaps around your face (causing cold spots), or
- Restricting breath moisture escape (creating dampness)
DIY sleeping bag hood modification steps:
- Sleep with your current hood setup while wearing a thin headlamp
- Note where light penetrates the hood perimeter
- Use a fabric marker to trace necessary adjustments
- Shorten the circumference by 1 to 2 inches at the lightest points (not the chin area)
- Add elastic cord locks for micro-adjustments
This custom fit maintains warmth while preserving critical moisture escape routes, which is key for humid climates where dampness creates dangerous temperature differences. For a deeper dive on sealing in heat without restricting breathability, read our sleeping bag hood design guide.
"Do sleeping bag liners for warmth actually add meaningful insulation?"
Most campers overestimate liners' warmth contribution. A study by the Outdoor Gear Lab showed typical fleece liners add only 3 to 5°F, but when used strategically, they solve larger problems:
- Moisture management: Silk liners wick better than cotton sheets
- Draft blocking: Heavyweight fleece liners fill gaps around hoods
- Hybrid insulation: Vapor barrier liners prevent heat loss from evaporative cooling
For true warmth gains, combine liners with proper layering: your base layer should be snug enough to trap air but not compress insulation. This is where "sleeping bags plus liner" calculations fail, real warmth depends on how those layers interact with your body's movement patterns.
"How do I test my DIY modifications before trusting them in the field?"
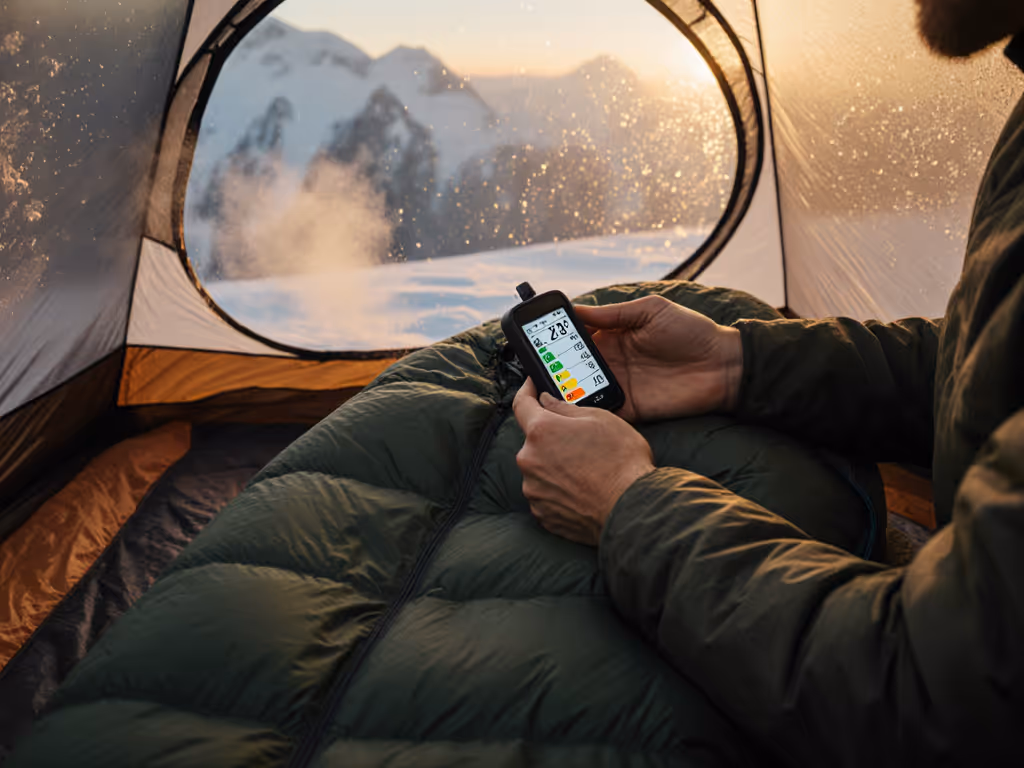
Never skip backyard validation. Set up your sleeping system the night before a big trip with an external thermometer inside your bag. Track:
- Temperature differentials between your core and extremities
- Moisture accumulation points (use a paper towel test: place small squares inside your bag overnight; damp spots indicate condensation zones)
- Movement comfort (roll through all your sleep positions)
This diagnostic approach reveals whether your modifications actually solve your specific cold spots or just create new problems. Remember: the same technique might add 10°F for one camper but backfire for another due to metabolic differences.
The Comfort Equation: Beyond Temperature Ratings
When optimizing your sleep system, consider these often-overlooked variables:
- Pad synergy: Your sleeping pad's R-value contributes 50%+ of your warmth. Modify your bag to hug your pad profile
- Humidity coefficient: For every 20% increase in humidity, effective warmth drops by ~4°F
- Positional heat loss: Side sleepers lose 15-20% more heat from shoulder compression points
- Breath moisture impact: One night of heavy condensation can reduce down loft by 30%
Stop chasing mythical temperature ratings and start diagnosing your specific thermal leaks. The most effective DIY sleeping bag modifications address the precise failure points in your system, not generic "cold weather" fixes that ignore the multi-factor nature of true comfort.
Related Articles