How to Dry Sleeping Bags: Prevent Moisture Damage
By Diego Martins • 10th May
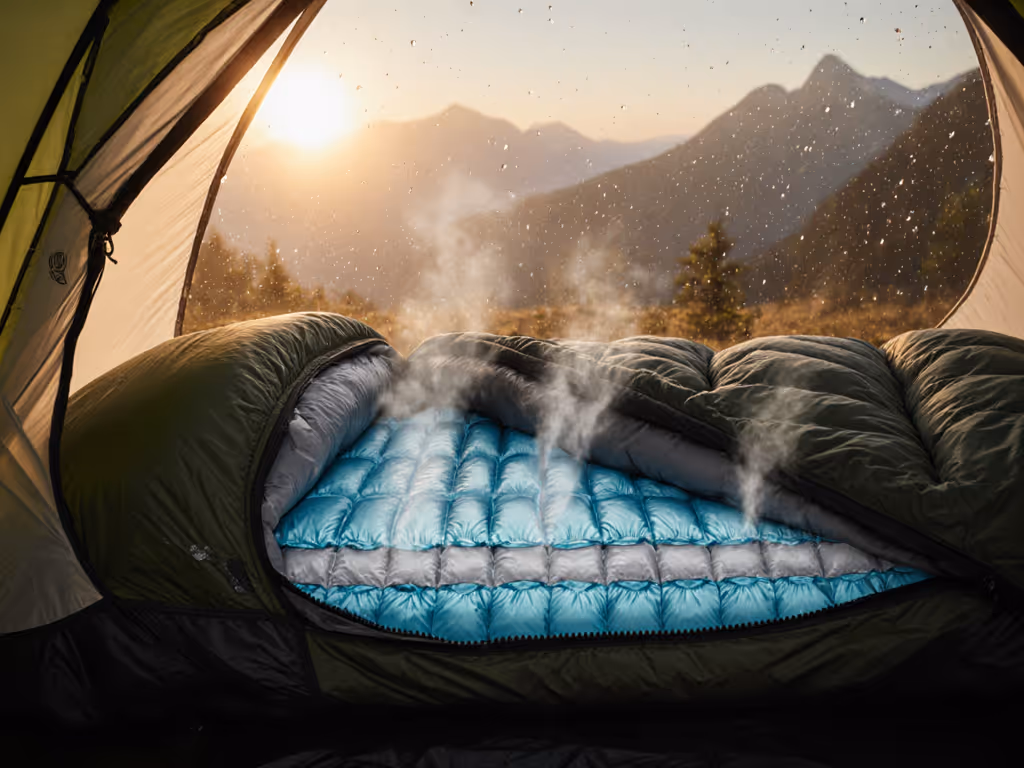
A wet sleeping bag is a dead sleeping bag (at least until it's properly dried). How to dry sleeping bags and sleeping bag drying techniques are not afterthoughts; they're critical to preserving the insulation that keeps you alive in the cold. Whether you're dealing with post-trip cleanup or rescuing a bag from a humid environment, the drying process determines whether your insulation retains its loft, repels moisture, and maintains its cost-per-night value. Mishandle it, and you're not just looking at a few wasted hours, you're facing potential mildew, permanent loft loss, and a bag that fails precisely when you need it most.
I learned this the hard way. On a shoulder-season desert loop, I chased budget camping and skipped a deliberate drying routine between trips. Dampness that seemed minor at the time migrated into my down bag's core. On a cold night a month later (radiant sky, low-R pad underneath, calorie deficit from miles) I discovered my bag had lost its edge. The cold sank through. Price-to-warmth matters, but failure costs the most outdoors. That realization shifted my entire approach: I'd rather invest an afternoon in proper drying than gamble on a season of compromised sleep and gear replacement costs.
Understanding the Stakes: Why Sleeping Bag Drying Matters
Moisture is insulation's enemy. Whether you're dealing with down sleeping bags or synthetic fill, water and humidity collapse the air pockets that create warmth. If you're choosing between insulations, see our down vs synthetic sleeping bags test for moisture performance insights. Down is especially vulnerable: clumped down loses its loft, and trapped moisture can trigger mildew (a silent killer that spreads through the baffles and contaminates the entire bag).
The stakes are both financial and physical. A quality bag represents real money: anywhere from $400 to $1,200 or more for a reliable four-season system. Poor drying doesn't just void warranties in many cases; it accelerates degradation that turns a ten-year asset into a five-year liability. Worse, a damp bag on a cold night doesn't just fail gradually, it fails when you need it most, when you're tired, when getting warm is harder, and when escape options are limited.
The cost-per-night math changes dramatically if the bag survives a decade versus three years. Spend where failure hurts; inadequate drying is exactly that kind of failure.
Moisture Removal and Mildew Prevention
Synthetic sleeping bag moisture removal and preventing mildew require speed and thoroughness. Moisture left unchecked spawns mold in 24-48 hours under the right (wrong) conditions: warmth, darkness, and humidity. Your goal is to eliminate moisture before it becomes permanent.
Down Sleeping Bags: The High-Touch Drying Protocol
Down is expensive, effective, and demanding when wet. Here's the honest teardown of what works.
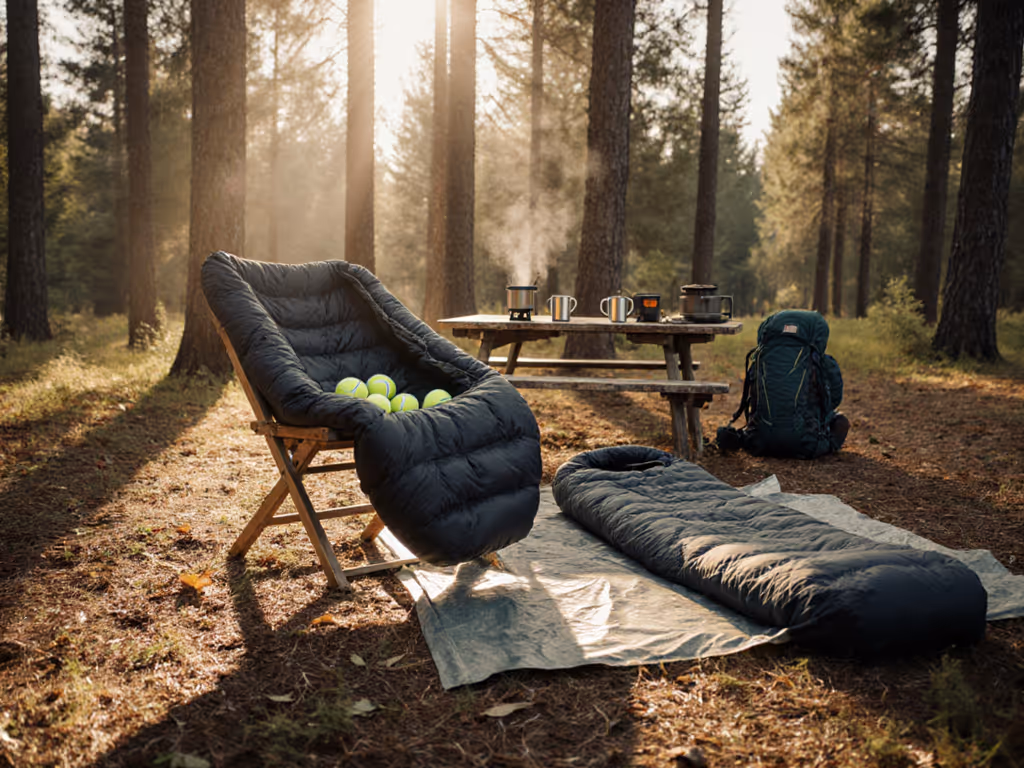
Machine Drying: The Fastest Path
The Dryer Method:
- Spin and Transfer: After gentle hand-washing and multiple rinses, gently squeeze out water without wringing. Transfer the bag to a large-capacity, front-loading dryer if possible. Top-loaders risk tearing seams.
- Heat Settings: Set the dryer to low or medium heat. High heat will melt the bag's nylon shell or down's exterior coating. Start with 30-minute cycles and check between each cycle. The fabric should feel warm, never hot to your palm.
- The Tennis Ball Trick: Add two or three clean tennis balls (or purpose-made down drying balls) to the drum. As they bounce, they mechanically break up clumped down and help restore loft. This is not optional. Clumped down is dead weight that won't insulate until it's separated.
- Typical Timeline: Expect 3-4 cycles of 30 minutes each for a standard 15-20-ounce down bag. Expedition-weight bags take longer. Check the care label; if it specifies a timeline, stick to it.
Air Drying: The Safe Alternative
If your dryer is too small or you lack access to a large machine, air drying works, it just demands patience and attention.
- Setup: Lay the bag flat on drying racks with narrow gaps (not a solid surface that traps moisture underneath). Place racks in a warm, well-ventilated area with low humidity and away from direct sunlight. UV degrades fabric; 30 minutes of sun exposure is enough for a refresh, but don't leave it out all day. For fabric breathability and moisture-wicking differences, see our sleeping bag shell fabrics guide.
- Active Fluffing: Every few hours, gently shake and flip the bag to break up down clumps. This manual intervention prevents permanent compression and ensures even drying. Skip this step and you'll end up with hard, dead zones in the insulation.
- Timeline: Expect 24-48 hours for full dryness, depending on humidity and temperature. Don't rush this. Hanging the bag or draping it over a line risks straining seams under its own wet weight.
Hybrid Approach (Recommended)
Run 2-3 shorter dryer cycles (20-30 minutes each), then finish with 12-24 hours of air drying. This accelerates the process while keeping heat exposure minimal and gives you a final chance to spot damp areas before storage.
Green Flag / Red Flag Check
Green flags:
- Bag is evenly fluffy with no clumps when touched.
- No musty or moldy smell.
- Fabric is cool, not warm or damp in seams.
Red flags:
- Clumpy zones remain; drying is incomplete.
- Musty smell = early mildew; restart the process immediately.
- Seams or the footbox feel damp; continue drying.
Synthetic Sleeping Bags: Faster, Lower-Stakes Drying
Synthetic fill doesn't hold moisture the way down does, but it can still clump and take a long time to dry. The upside: you can use lower heat and shorter timelines without risking permanent loft loss.
Machine Drying Synthetic Bags
- Heat Setting: Low heat or no heat (air dry cycle if available). Synthetic fabrics can melt at moderate temperatures.
- Tennis Balls: Include tennis balls here too; synthetics clump just like down.
- Spin Cycles: Use two spin cycles before the dryer to remove excess water. This cuts drying time significantly.
- Timeline: 2-3 hours on low heat, then 8-12 hours air drying, is typical.
Air Drying Synthetic
Synthetic dries faster than down when hung or laid flat. Support the bag on a drying rack to avoid stressing seams. 12-24 hours in a warm, dry, well-ventilated space should complete the job.
Preventing Mildew in Sleeping Bags: The Long Game
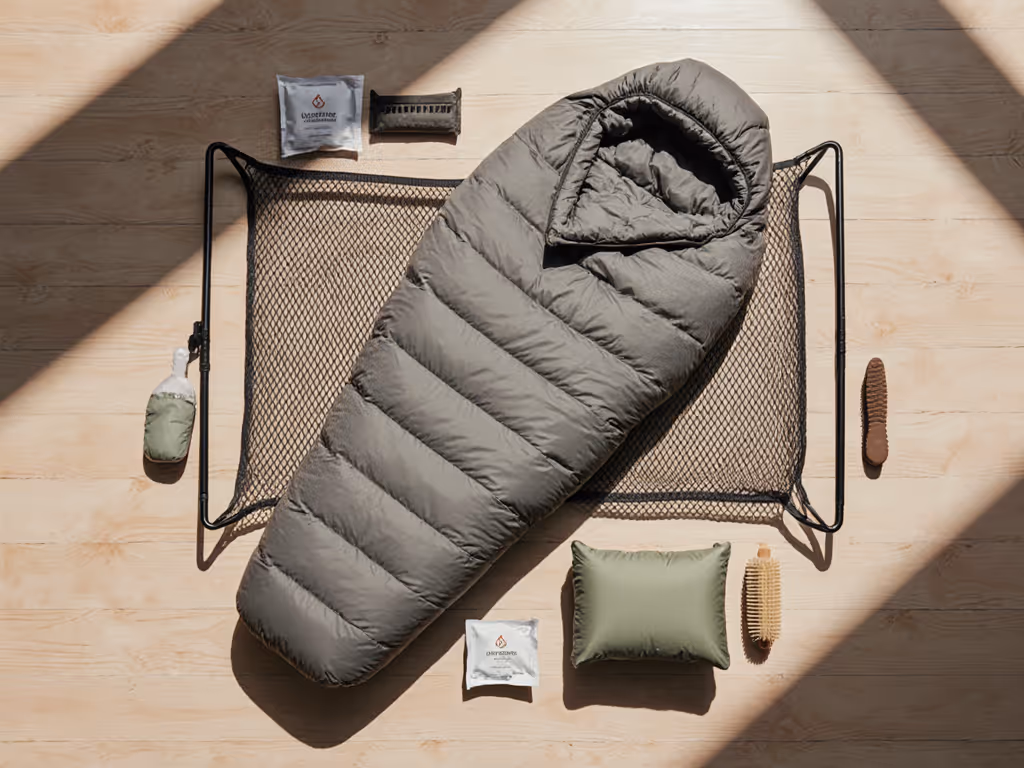
The drying process is also prevention. Once your bag is dry, storage matters.
- Store dry: Never store a bag that feels remotely damp. Even slight residual moisture invites mildew.
- Breathable storage: Avoid plastic bins. Use a breathable cotton storage sack or hang the bag loosely in a closet. Air circulation prevents stagnation.
- Cool, dry environment: A basement or garage with stable temperature and low humidity is ideal. Attics and humid crawl spaces accelerate degradation.
- Occasional refresh: If you store a bag for months, take it out every 2-3 months, air it briefly, and return it to storage. This interrupts dormant mold growth. For seasonal storage specifics, follow our long-term sleeping bag storage guide.
The Proper Sleeping Bag Drying Process: Integration Into Gear Maintenance
Drying is one step in a larger repair-first philosophy. If you're washing your bag quarterly or semi-annually (depending on use), drying protocols become routine, not crisis management. Many warranty failures stem from user error in drying, not manufacturing defects.
Cost-per-night math: A $600 bag used 40 nights per year costs $15 per night. If poor drying halves its lifespan from 10 years to 5 years, you've added $7.50 to the per-night cost. Proper drying that extends life to 12 years cuts that to $1.25 per night. The time investment pays itself back immediately.
Summary and Final Verdict
How to dry sleeping bags boils down to two principles: speed without heat, and active fluffing for down. Machine drying with tennis balls and low heat is the fastest, most reliable path for down sleeping bags. Synthetic bags tolerate lower heat and shorter timelines. For both, the hybrid approach (dryer cycles followed by air drying) balances speed and safety. Air drying alone works if you have time and a low-humidity environment.
The real cost of drying is measured in hours, not money. Spend that time properly, and your bag stays reliable for a decade. Ignore it, and you're gambling on a cold night when you can't afford to lose. Price-to-warmth matters, but failure costs the most outdoors. A properly dried bag retains its insulation, its warranty value, and your trust when you need it most.
Start your next wash and drying cycle today, and treat it like the critical maintenance it is. Your sleep (and your safety) depends on it.
Related Articles